Easy Money Origami Shirt and Tie
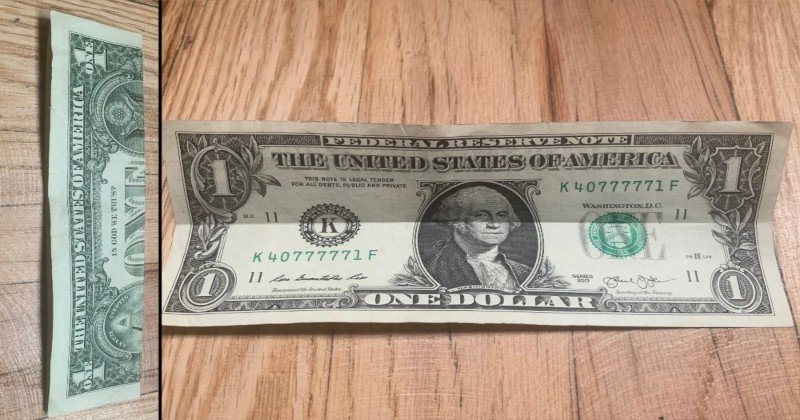
Make this dollar bill origami shirt and tie on your first try with this easy step-by-step money origami guide. Dollar origami is a fun hobby and skill to learn. These pieces of money art that you create are great for gifts, tips, and impressing others. Don't worry; you will not mess it all up if you misfold once or twice. If you want a similar fold that is a little easier to start with, check out our regular money origami shirt without the tie. Here we go! You may also like these other money origami guides: Fold the bill in half to make a crease, and then unfold it. STEP 2: Fold the bill in fourths Fold both halves lengthwise to meet your center crease, then unfold it again. Make sure to rub the edges to make good creases. You should now have three visible creases made on the bill. Fold the two corners of the left side of the bill to meet the middle crease, then fold that whole side down. This will make a new crease right below where your newly folded corners sat. Hardest Part: Picture the tie, and fold one side of the tie at a time. Don't get in a rush; this is a challenging part. Use the lines on the bottom tip of the tie and work diagonally until you get to the top of the bill. It doesn't have to be perfect because you can make the tie skinnier or fatter based on your preference. You have to do what is called "squash folding." Start by folding softly until you can get the line where you want it. Then fold it hard and crease it when the sides look good and even. It should look something like this underneath, and once you have folded both sides. This is an example of a thicker tie. Next, fold the sides to the center crease and tuck them under the tie. There will at least be a small gap due to the underpart of the tie keeping the two sides apart. The most important thing is just focusing on making it as straight as you can. On the other end of the bill, fold the whole end over. The crease should be on the closest green line to the edge. You just made the back of the shirt collar. Flip the whole thing over and fold the front collars. Fold the corners so that they touch and use the tips of the pyramids as shown as guides to make the folds. You want the collars as even as you can get them and touching at the top when pressed down. Again, it doesn't have to be perfect, as you will be able to adjust it later if needed. Fold from the very bottom of the collar to the other side to line up underneath the tie. You can use the bottom of your previous fold or the bottom right tip of the pyramid as a guide to fold it over. Make the sleeves by pulling up the lower collar half and pushing out each middle edge of the bill. This is probably the second hardest part, so be easy on yourself and take it slow. It may be easier to pick a mark like George Washington's left eye as the beginning part of your fold. Folding one sleeve at first makes it easier. Just don't crease them hard until you have both as even as possible. Then try to manipulate the sleeve until you can fold them down even. Flip the whole thing over to the backside of the bill with the sleeves up top, and fold the bottom to line up the tie between the sleeves. Last Step: Flip it over again and fold the collar over the back to tuck over the shirt and tie. You did it! You have a finished dollar bill origami shirt and tie! Learn how to fold dollar bill origami pants to go with this money shirt and tie. You may also like this other money origami guide:
STEP 1: Fold the bill in half horizontally
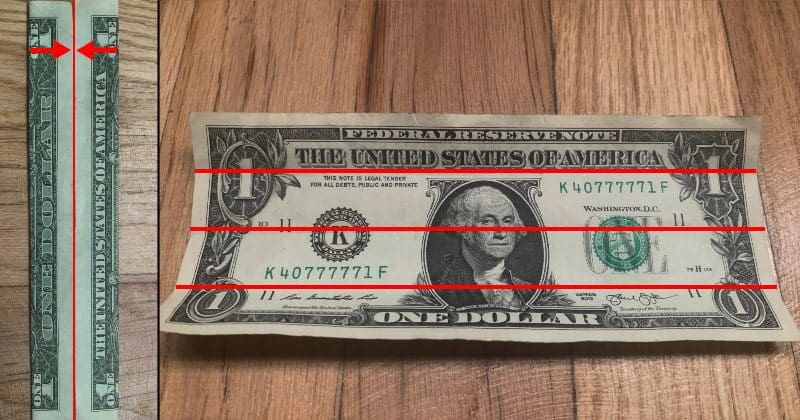
STEP 3: Start the tie
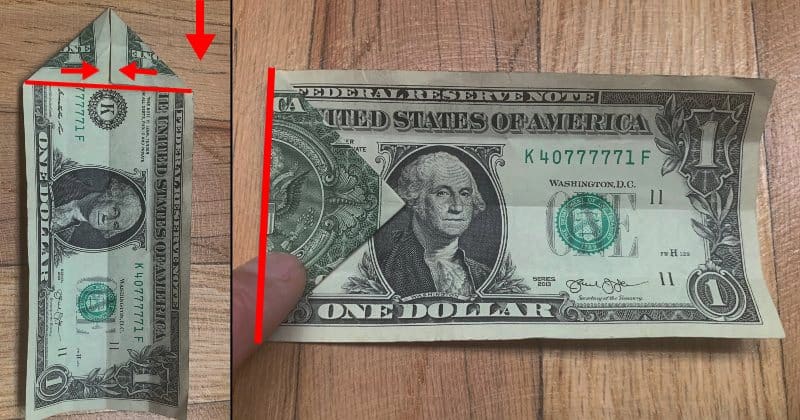
STEP 4: Make the tie
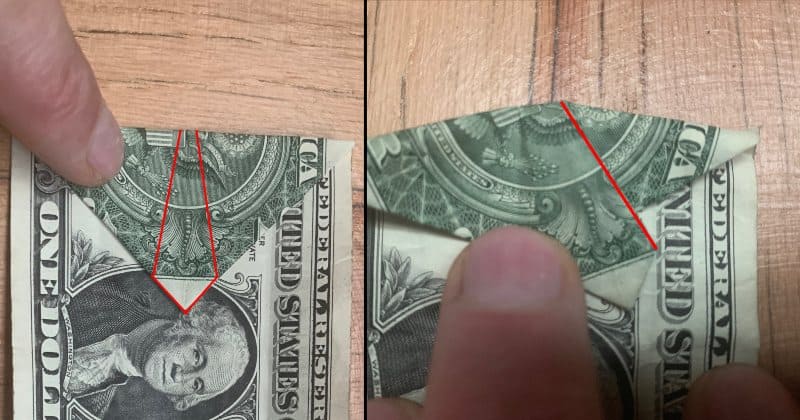
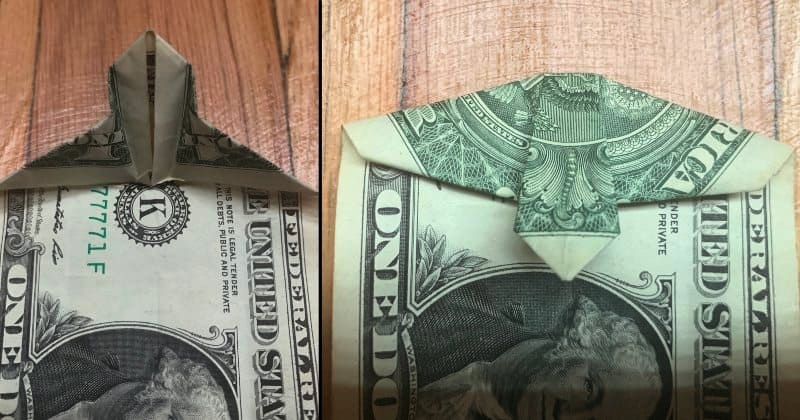
STEP 5: Tuck the shirt under the tie
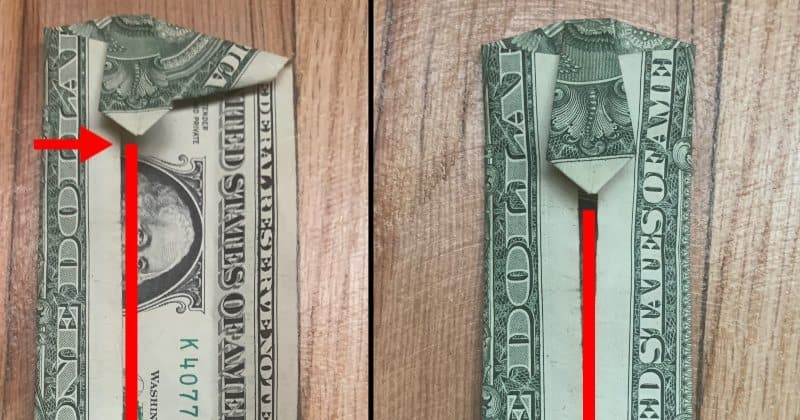
STEP 6: Fold the back of the collar
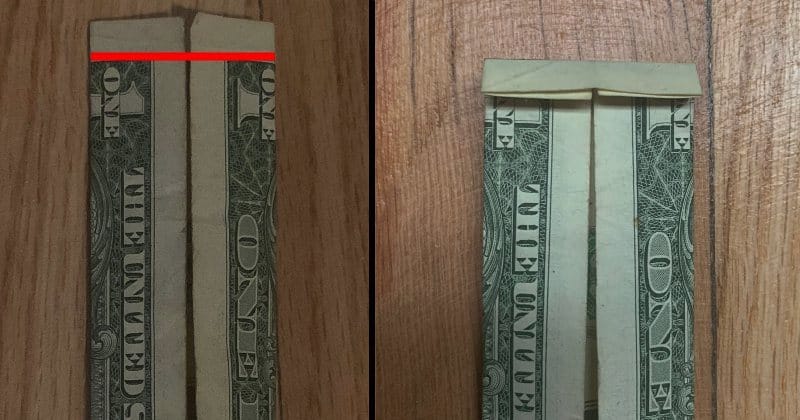
STEP 7: Fold both front collars

STEP 8: Line up collar under the tie
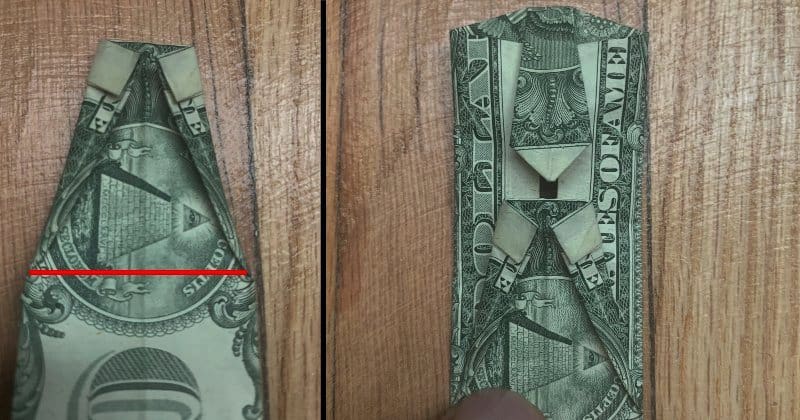
STEP 9: Make the shirt sleeves
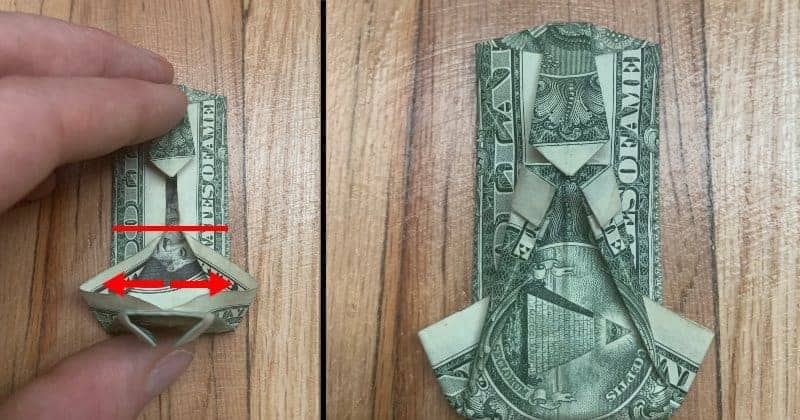
STEP 10: Line up tie with the sleeves
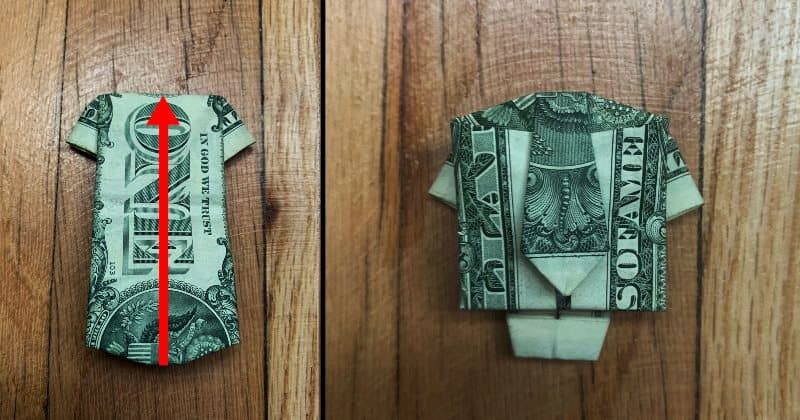
STEP 11: Fold the collar over the shirt and tie
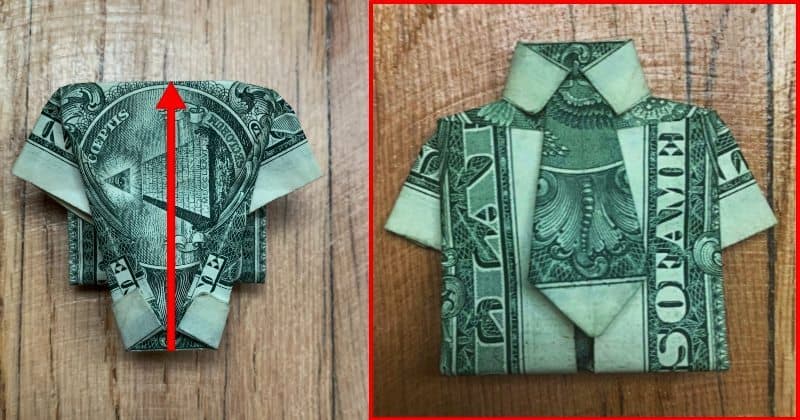
Easy Money Origami Shirt and Tie
Source: https://the-daily-dabble.com/dollar-bill-shirt-and-tie/
0 Response to "Easy Money Origami Shirt and Tie"
Post a Comment