How to Make a Origami Paper Flower Stem
Materials required
Origami paper OR Color papers of square size 15 cm.
Take two colors for the flower and stem.
Step-by-step tutorial to make a paper tulip flower

You can either use color paper or Origami paper. Here we used color paper. It's an A4 size paper. We cut it into a square paper of size 15 cm (1a).
Now, fold the paper diagonally so that the upper right corner meets the lower-left corner (1b).
Now, fold it again from left corner to right (or right to left) to form another triangle as seen in 1d.
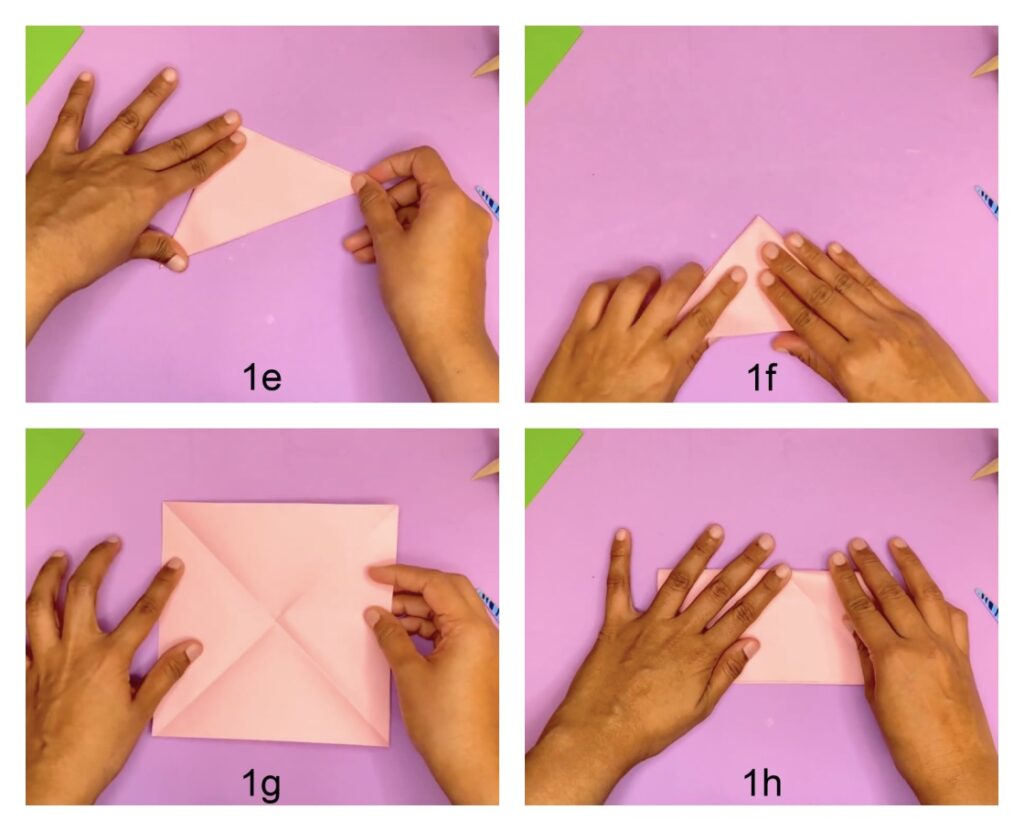
Make a crease again so that the lines will be clearly visible later (1e and 1f).
Unfold (1g).
Fold from top to bottom and make a crease again (1h).
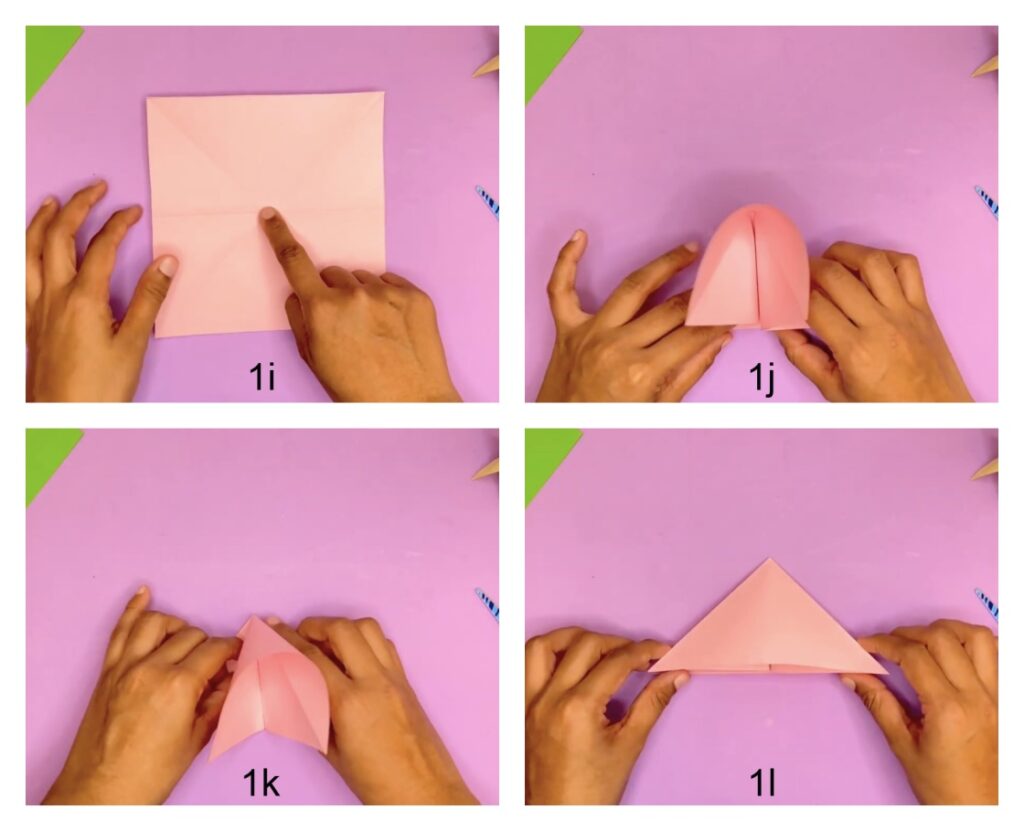
Look carefully at this step. This is a common Origami fold called waterbomb base. We used this same fold in making paper frog too.
To make the fold, poke the center of the paper and make it pop in(1i).
Now, along the horizontal crease we made in 1h, bring the left and right crease to the center (1j and 1k).
Now slightly press the upper portion along the creases to form the triangle shown in 1l.

Take the right corner and fold it to touch the top corner (1m). Make a crease (1n).
Take the left end corner and do the same (1o and 1p).

Now turn the figure over (1q). Fold the left and right corners to the top corner and make a crease (1r – 1t).
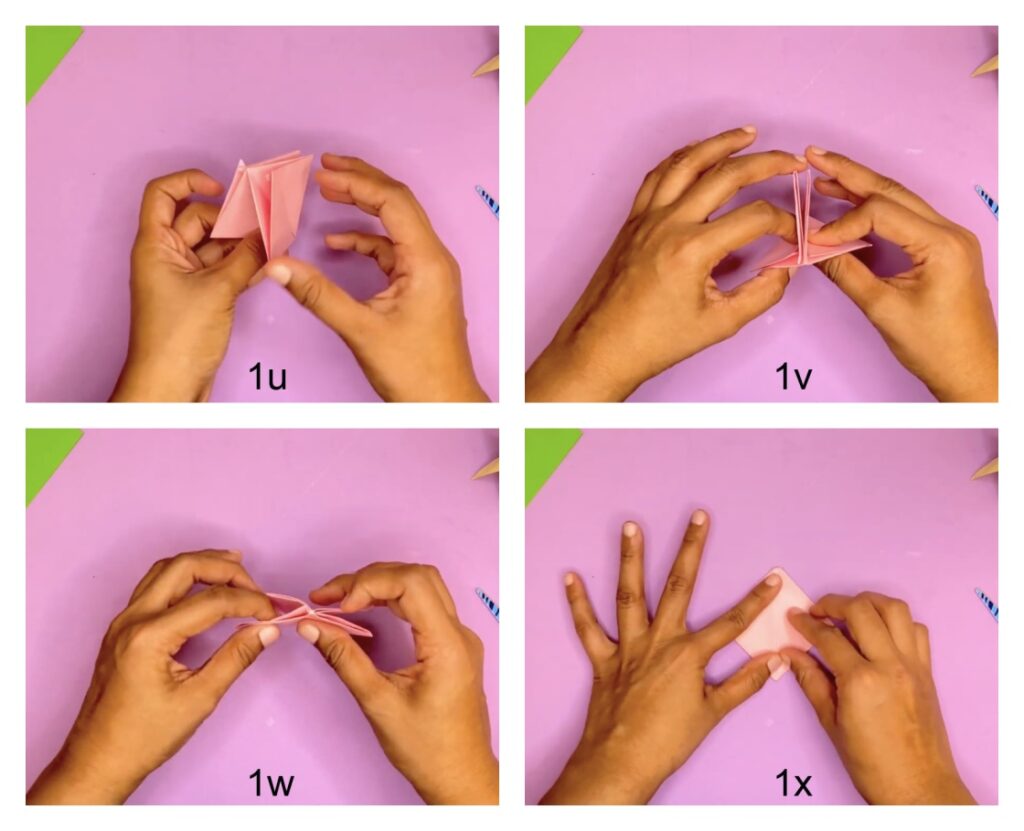
Now, turn the figure as shown in pic 1u. ie, turn the left corner towards your center (1u). Hold the upper two flaps together as shown in 1v, and open the bottom flaps so that they lie in a straight line.
Now, bring the upper two flaps down at the same time and you can see that in pic 1x, the paper has no slits as opposed to earlier.

Now, rotate the top corner 90 degrees (see the black arrow in 1y) so that we can proceed to the next step of the folding.
Take the left corner and fold it to the center (1z). Make sure to fold a little further from the center.
In the same way, fold the right corner to the center (1aa). Now tuck the right flap into the left one (1ab).


Now, turn the figure over. And repeat the same step as in 1ab (see pic 1ac).
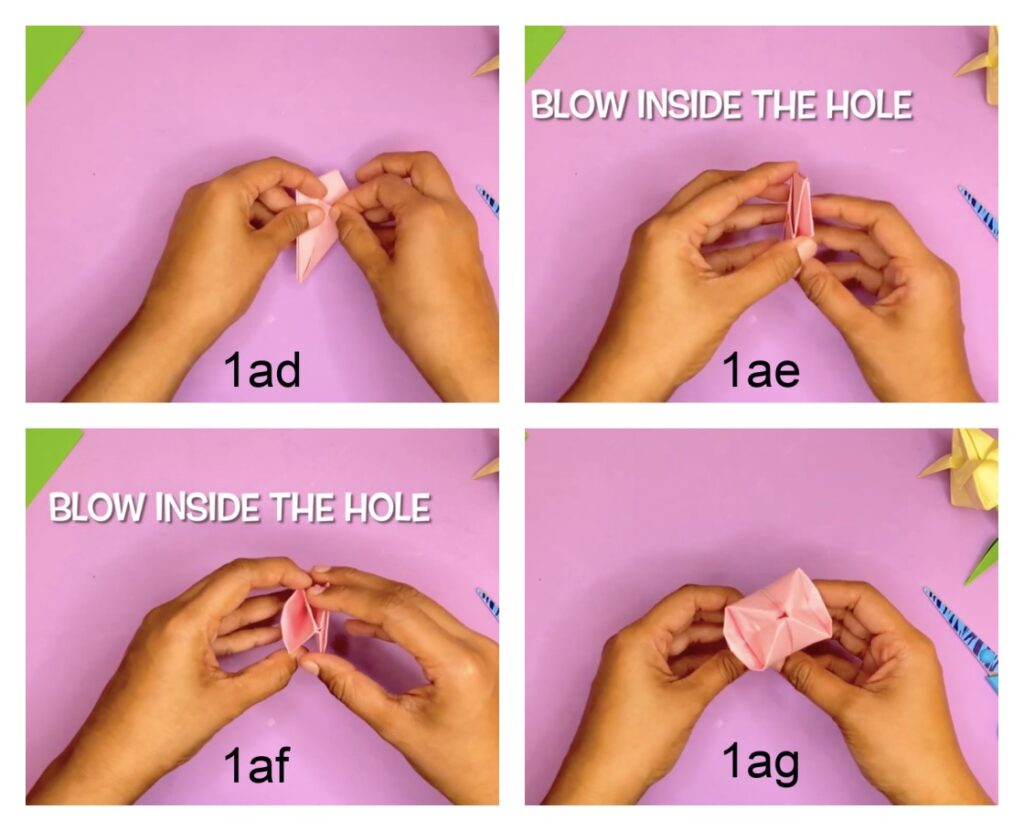
Spread the flaps apart as shown in 1af. You can see a hole in the center. Blow into it and it will puff up (1ag) .
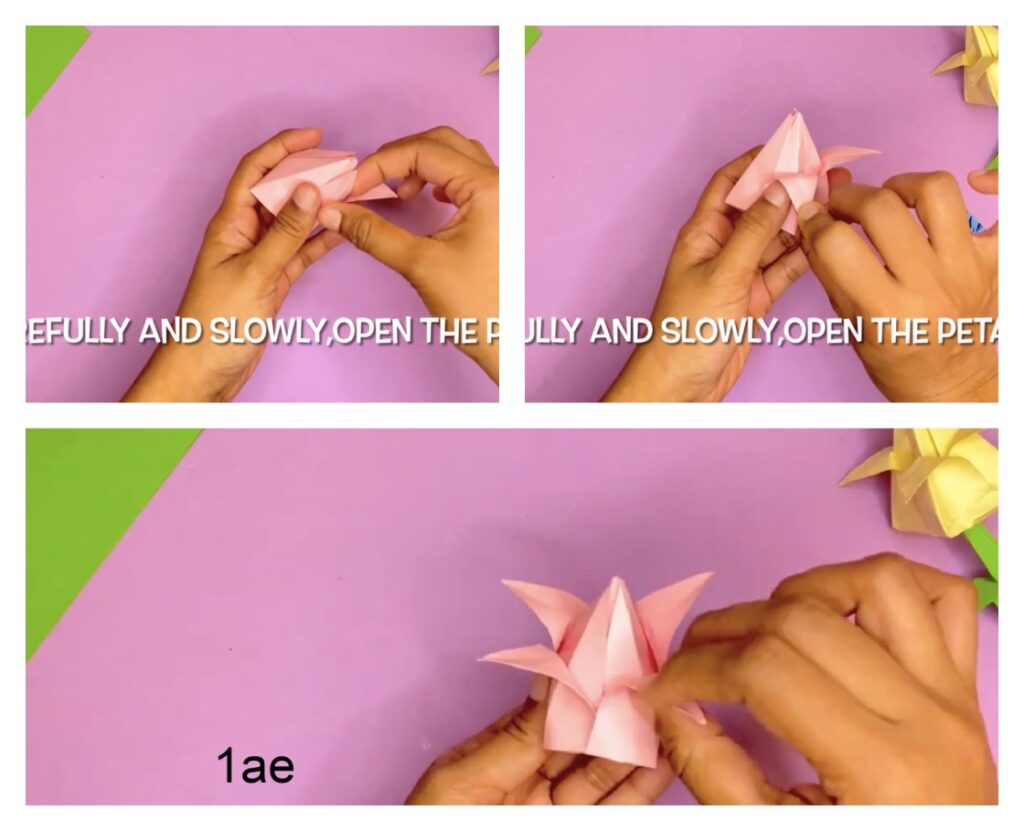
Once it puffs up, pull the petals one by one slowly and curl it (1ae).
Thus, the flower portion of the Origami tulip flower is ready. Let's move onto making the stem and leaf.
Step 2: Make the stem and leaf of the paper tulip

Take a square paper of size 15 cm (2a). Fold it diagonally to form a triangle (2b).
Make a crease (2c). Unfold (2d).

Fold the upper right and left edges to the center (pics 2e-2h). Remember to make creases after folding.
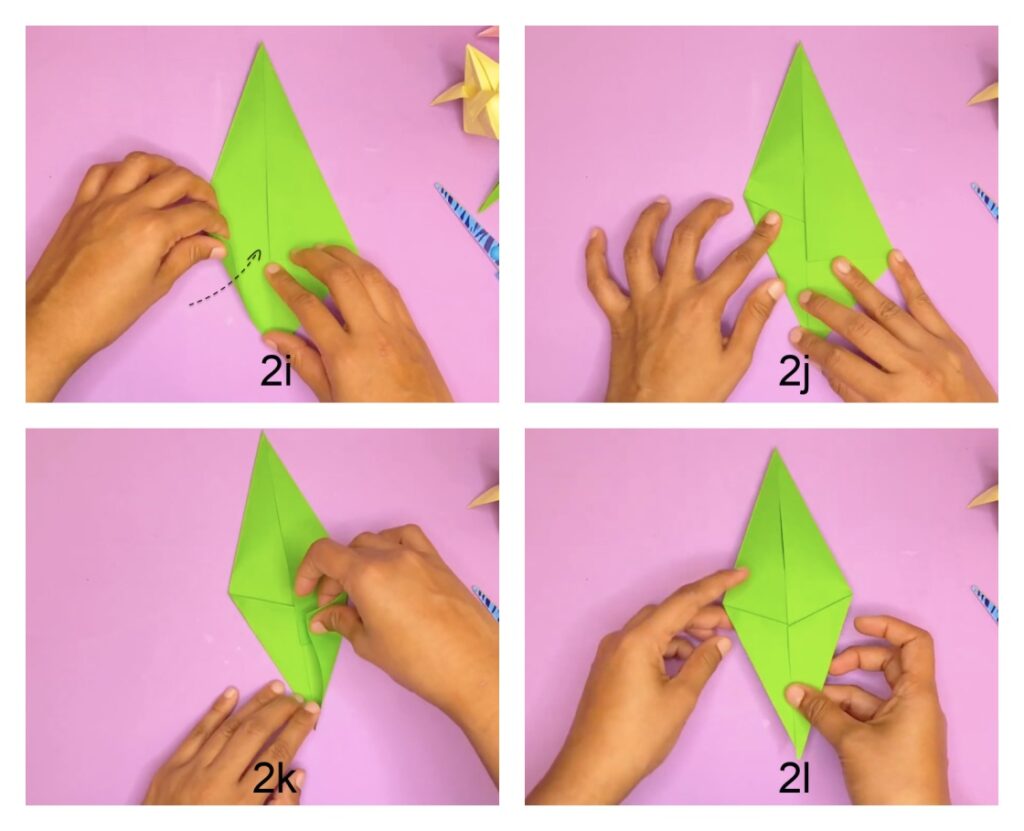
Similarly, take the lower left and right corners and fold towards the center. (2i-2l).
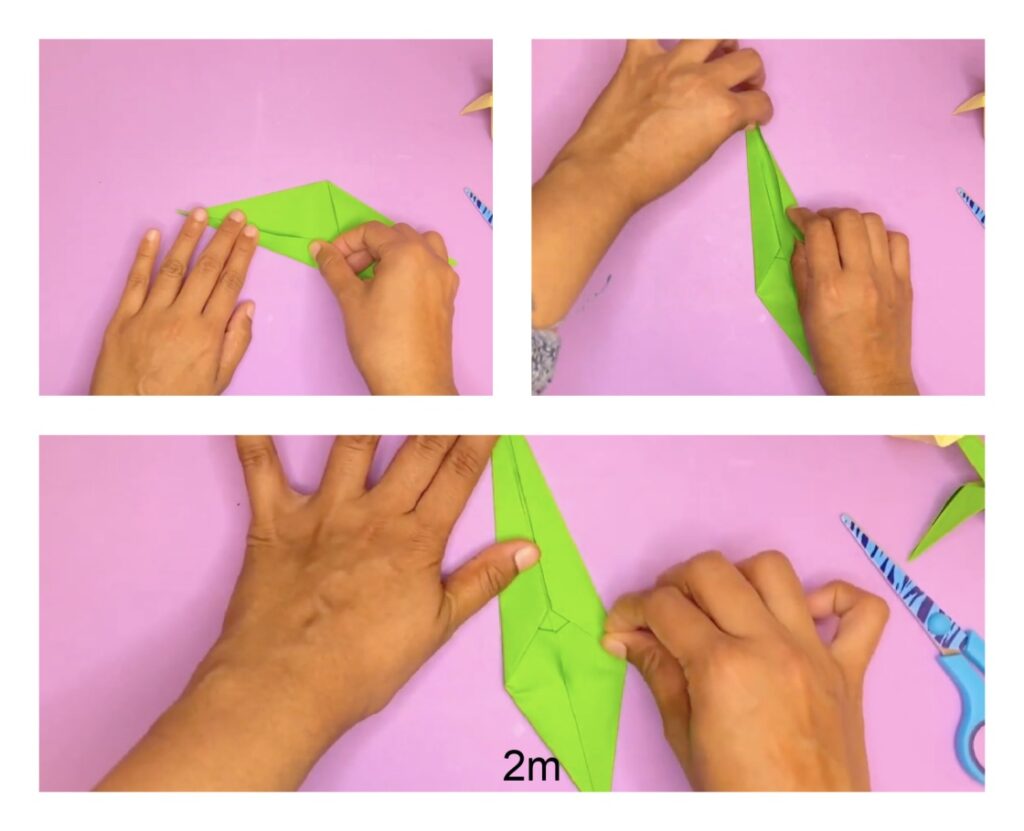
Turn the figure over (2o). Now fold the figure from left to right and press it well(2p and 2q). The next step is to peel the stem from the inside (2r).
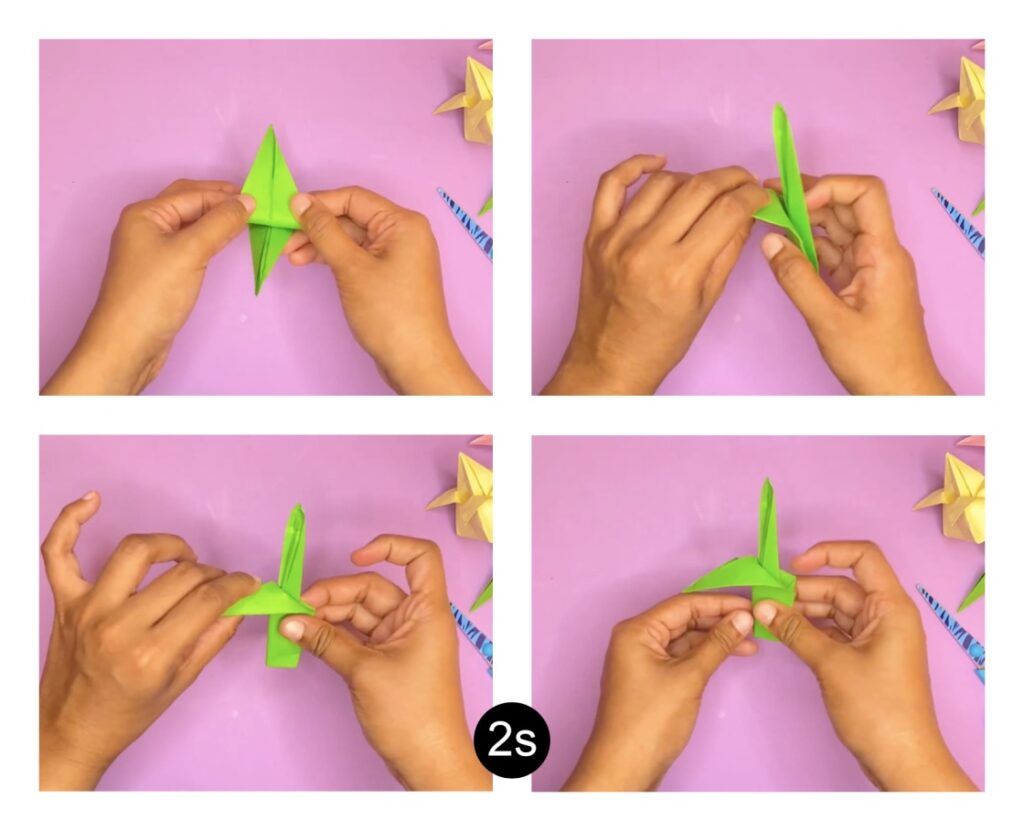
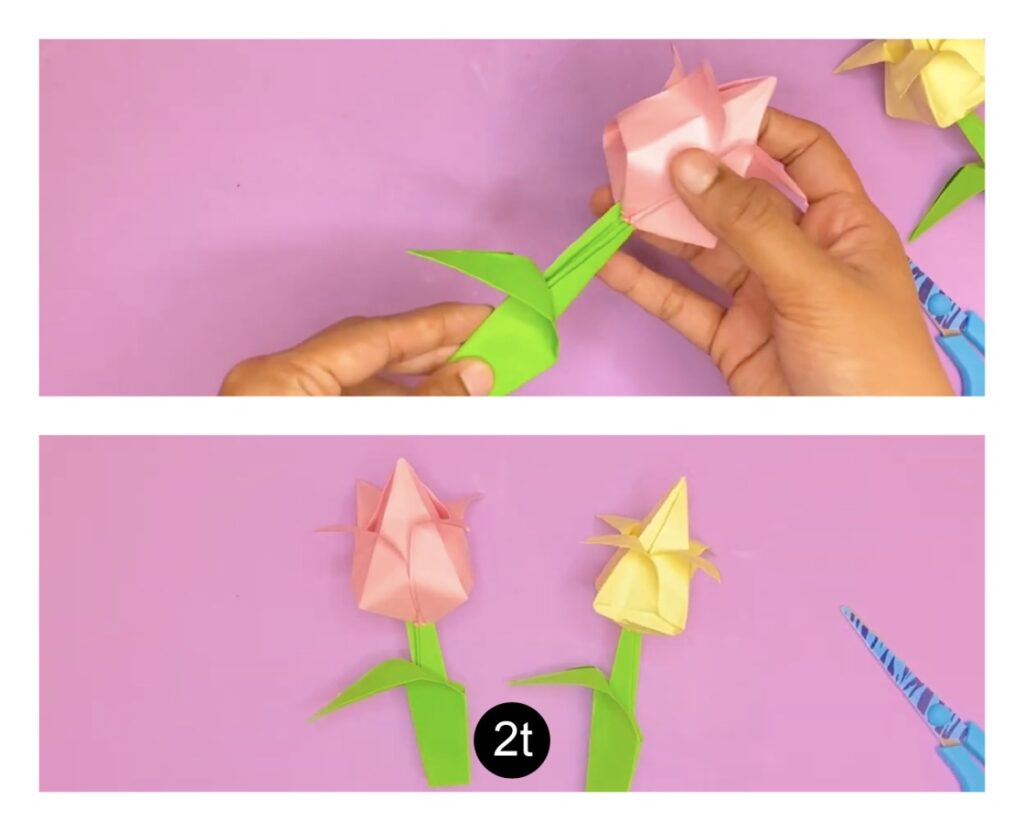
How to Make a Origami Paper Flower Stem
Source: https://thepurpleyarn.com/make-origami-paper-tulip-stem-leaf/
0 Response to "How to Make a Origami Paper Flower Stem"
Post a Comment