Origami Step by Step Easy Star
Ever seen those beautiful 5 pointed star decorations that have been made from paper using Origami. They look really difficult to do but they are not. These Origami Star instructions will show you in a video and step by step instructions how to make an Origami Star (or more) yourself.
There are many thoughts about the origin and meaning of a 5 pointed star but generally in modern western culture it relates to fame. Think about the Hollywood Walk of Fame. It is also used as a star at Christmas to place on top of the tree. You can make a book folded Christmas tree to put yours on here.
With all Origami the key to success is accuracy and crisp folds.

Whatever you want yours for this is how to make your star Origami. This video will show you all the details and is easy to follow along with.
Hint: the video is much easier to follow than the written instructions!
This page contains affiliate links meaning I earn a small commission if you use those links at no cost to you. I only recommend brands I use and trust.
If however you prefer written instructions then these Origami Star step by step instructions are for you.
You will need:
A pentagon of paper (see this tutorial showing you how to make your pentagon from a square of paper)
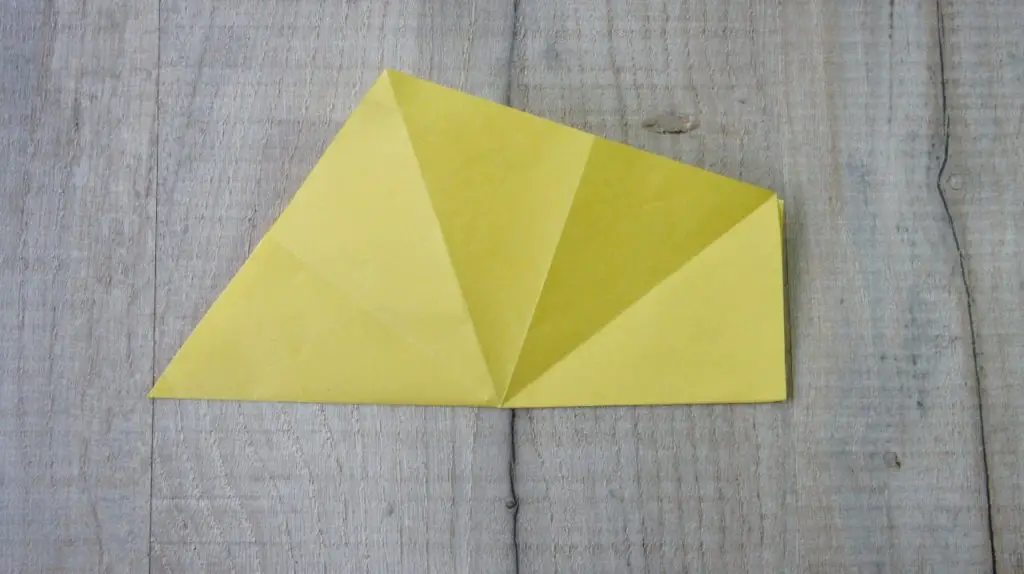
Step 1 Folding in half
The first thing you need to do is fold your pentagon in half as shown in the picture. Open it out again and repeat for all the 5 points of the pentagon.
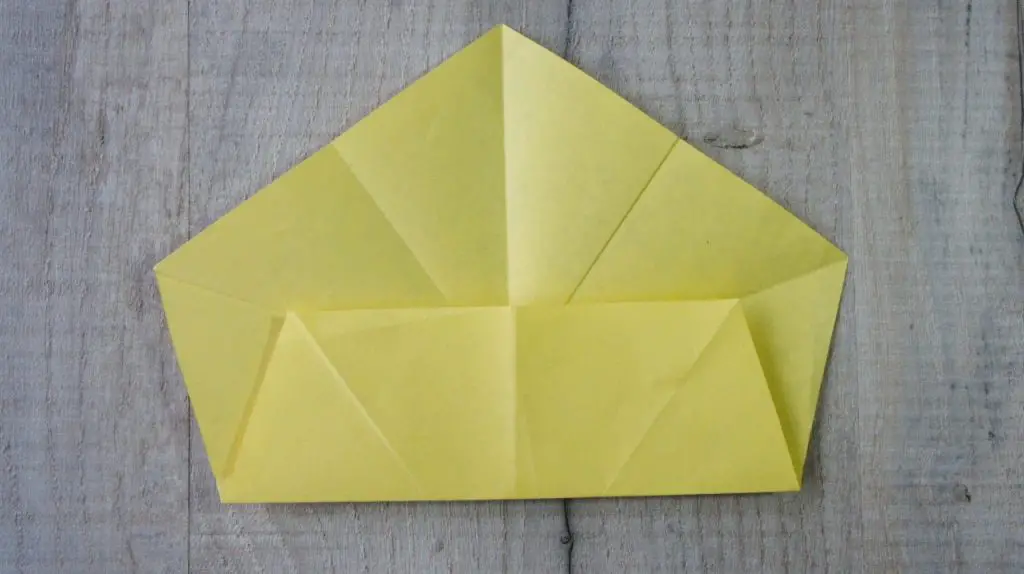
Step 2: Folding up the sides
Place the pentagon so a flat side is towards you. Fold it up onto the pentagon so that the side reaches the folds on the upper two outside points. This is shown below. Unfold it and repeat with all 5 sides.
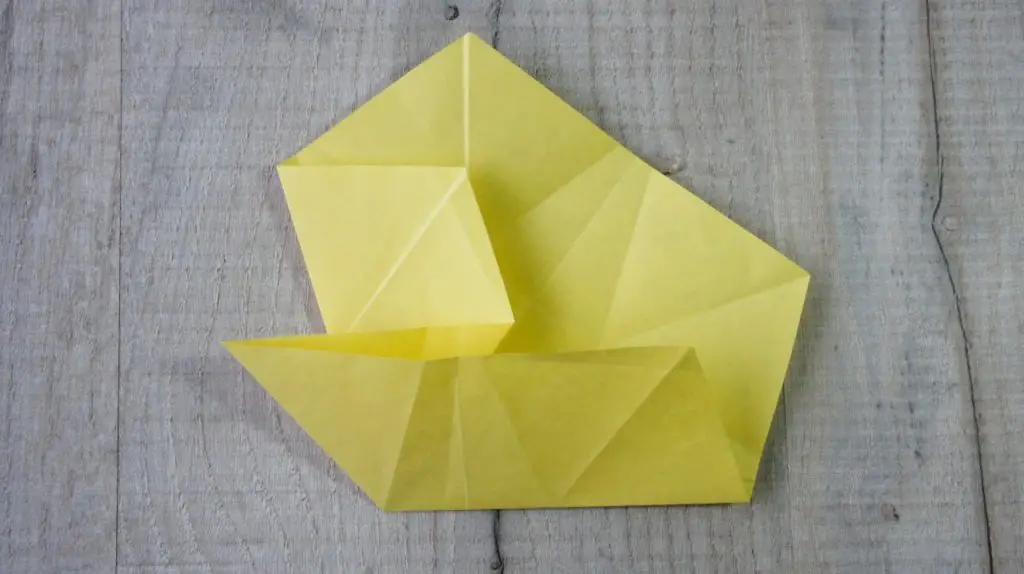
Step 3: Forming the points
Place your pentagon so that a side is towards you. Now fold the left hand side in along the crease that you already made. Fold the bottom side up along the crease that you already made. Ensure that you pull the point out as shown in the picture below. This may be a bit fiddly but persevere. Unfold and repeat the process for all 5 points.
Step 4: Form the star shape
In turn work your way around the pentagon pulling your points up. You are slowly forming a 3D shape. Your pentagon will start to look like a bowl.
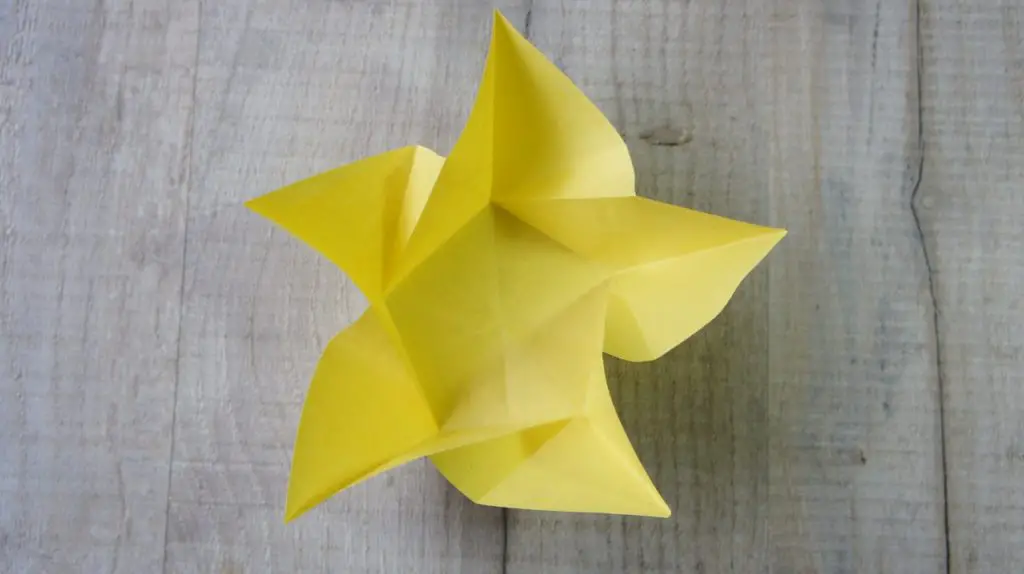
Keep doing this until you can overlap the points in an anti-clockwise direction an d they all interlock to form your star shape. You will now have a flat star shape as shown. This is the back of your star.
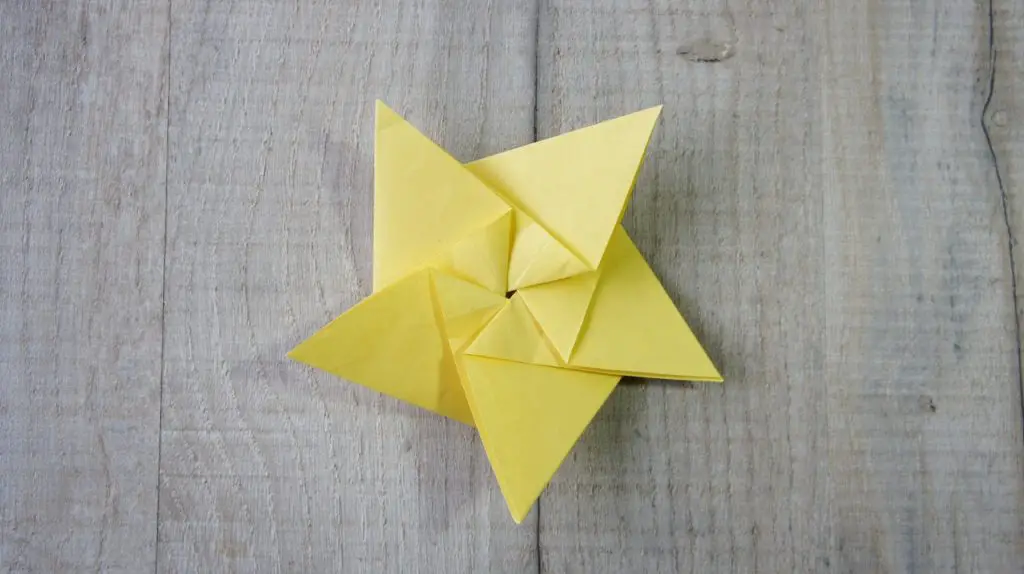
Step 5: Form the front of your star
Turn over your star and it should look like this.
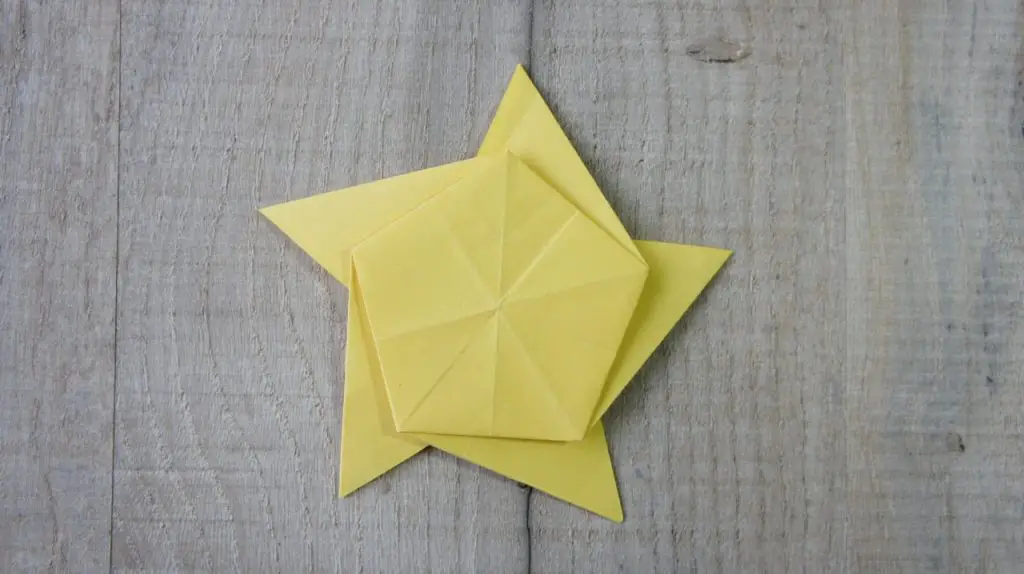
In turn take each point and fold it in half so that the point of the inner pentagon meets the centre of the pentagon. In between open out the fold.
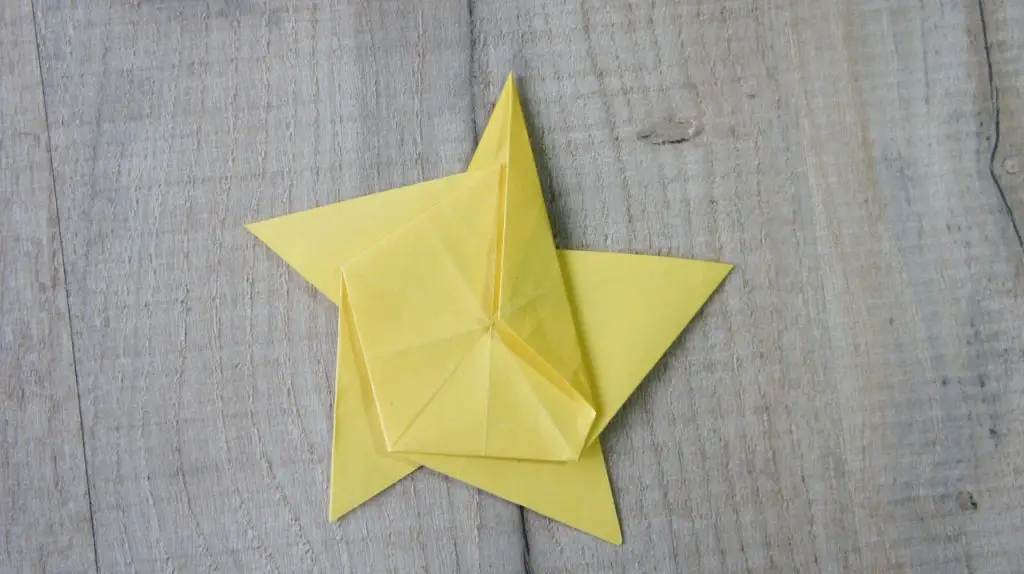
Finally re-fold all these folds so that they interlock. On the last one just be careful to tuck it under the next point along.

Well done, you have completed your first Origami five pointed star. Play around with sizes and papers to see what effects you can achieve. You can use paper that is printed differently on either side or how about a giant piece of paper for a giant Origami 5 pointed star?
If you like paper crafts then take a look at these other great tutorials:
Folded Book Christmas tree
Folded Book Christmas Angel
Iris Paper Folding
Paper Flower Tutorials
Please comment below and let me know what you use your 5 pointed star for. Feel free to share these instructions for how to make an origami star with your friends and beyond.

Origami Step by Step Easy Star
Source: https://christines-crafts.com/how-to-make-a-5-pointed-star-origami-tutorial/
0 Response to "Origami Step by Step Easy Star"
Post a Comment